Vue Report Widgets
A dashboard widget powered by Vue.js
# Creating Custom Dashboard Widgets
The dashboard system enables developers to create custom configurable widgets, offering functionality that extends beyond the capabilities of the built-in widgets. These custom widgets can be designed with any appearance and functionality, including the ability to fetch data and handle events through AJAX requests.
# Creating and Registering Custom Widgets
Dashboard widgets use the October CMS Vue framework. The framework simplifies the development of both server-side and client-side parts.
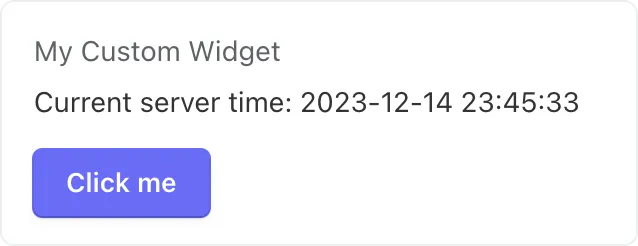
In this documentation, we will create a simple component that displays the current time and includes a button. The button's click action will be handled on the server using AJAX.
Dashboard widgets should be placed in the vuecomponents directory located in the root directory of a plugin, for example, author/plugin/vuecomponents. Each component must include a PHP file for server-side implementation, a JavaScript file for the Vue component, and a PHP file for the Vue template. Below is an example of the file structure for a widget. Note that the names of the CSS, JavaScript, and partial files are derived from the widget’s class file name:
├── vuecomponents
|   ├── mycustomwidget
|   |   └── assets
|   |       └── css
|   |           └── mycustomwidget.css  ← StyleSheet File
|   |       └── js
|   |           └── mycustomwidget.js  ← JavaScript File
|   |   └── partials
|   |       └── _mycustomwidget.php  ← Partial File
|   └── MyCustomWidget.php  ← Vue Widget Class
# Server-Side Class
The server code for a dashboard widget must define a class that extends Dashboard\Classes\VueReportWidgetBase. The only required method that a widget class needs to implement is getData. Below is the initial implementation of the class (MyCustomWidget.php):
namespace Acme\MyPlugin\VueComponents;

use Dashboard\Classes\VueReportWidgetBase;
use Dashboard\Classes\ReportFetchData;
use Carbon\Carbon;

class MyCustomWidget extends VueReportWidgetBase
{
    /**
     * @var string componentName is the Vue component tag name.
     */
    protected $componentName = 'acme-myplugin-vuecomponents-mycustomwidget';

    public function getData(ReportFetchData $data): mixed
    {
        return [
            'current_time' => Carbon::now()->format('Y-m-d H:i:s')
        ];
    }
}
The VueReportWidgetBase class extends Backend\Classes\VueComponentBase and provides the dashboard-specific functionality needed for report widgets. The $componentName property is required and defines the Vue component tag name. The convention is to use the fully qualified class name in lowercase with backslashes replaced by hyphens (e.g., Acme\MyPlugin\VueComponents\MyCustomWidget becomes acme-myplugin-vuecomponents-mycustomwidget).
# Client-Side Component
The Vue component for the widget must be defined as an ES module in the assets/js directory. The component uses export default and extends the base widget class. Example component code (assets/js/mycustomwidget.js):
import WidgetBase from '../../../../../../../modules/dashboard/vuecomponents/dashboard/assets/js/widget-base.js';

export default {
    extends: WidgetBase,
    data: function () {
        return {
        }
    },
    methods: {
        useCustomData: function () {
            return true;
        },

        makeDefaultConfigAndData: function () {
            this.widget.configuration.title = 'My Custom Widget';
        },

        getSettingsConfiguration: function () {
            const result = [{
                property: "title",
                title: "Title",
                type: "string",
            }];

            return result;
        }
    }
};
The component is automatically registered by the VueMaker trait when the widget's PHP class is loaded. The template is injected from the partial file, so you don't need to specify a template property in the JavaScript.
Widget Vue components must include all the methods outlined in the example code. Specifically:
useCustomData- this method must returntrueto inform the dashboard system that the component manages its own data cycle.makeDefaultConfigAndData- sets the default widget configuration. In our example, we assign the widget title using direct assignment (Vue 3's Proxy-based reactivity makes this reactive automatically). The configuration object's keys are arbitrary and intended for the widget's internal use. We will later demonstrate how to access the widget configuration in the component template. In the server-side code, the widget configuration can be accessed in thegetDatamethod via thewidgetConfigargument.getSettingsConfiguration- provides the configuration for the widget’s settings form. The configuration is defined using JavaScript objects and aligns with the Inspector fields configuration (opens new window).
The component Vue template must be defined in a partial file located in the partials directory, as mentioned above. Below is a basic implementation of a component template (partials/_mycustomwidget.php):
<div class="widget-body">
    <h3 class="widget-title" v-text="widget.configuration.title"></h3>

    <div v-if="!loading">
        <p>Current server time: <span v-if="fullWidgetData" v-text="fullWidgetData.data.current_time"></span></p>
    </div>
    <p v-else>Loading...</p>
</div>
The template illustrates how to retrieve the title property from the widget configuration, previously set in the makeDefaultConfigAndData method.
It also demonstrates accessing the loading property, supplied by the dashboard system. This property switches to true during data loading AJAX requests, handled by the dashboard. These requests can be triggered by changes in component configuration or when the user selects a date range on the dashboard. You can leverage the loading property to indicate the widget's loading status.
Lastly, the template guides you on accessing server-provided data using the fullWidgetData.data structure.
# Registering a Widget
Dashboard widgets must be registered in the plugin registration file (Plugin.php), within the registerReportWidgets method. The method should return an array containing the widget classes in the keys and widget configuration (label, group, and required permissions) in the values. The vue property should be set to true to indicate that it is a Vue component.
public function registerReportWidgets()
{
    return [
        \October\Test\VueComponents\MyCustomWidget::class => [
            'label' => 'Custom Widget',
            'group' => 'Acme Author'
        ]
    ];
}
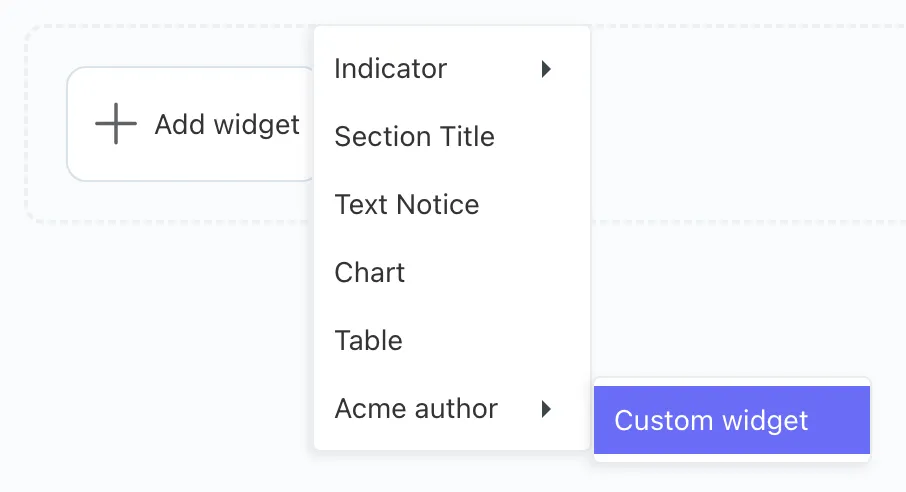
The label and group properties of the registerReportWidgets return array are the widget's name and the author's name. These will be displayed in the Dashboard user interface, particularly in the Create Widget menu. Once the widget is registered, you can add it to the dashboard:
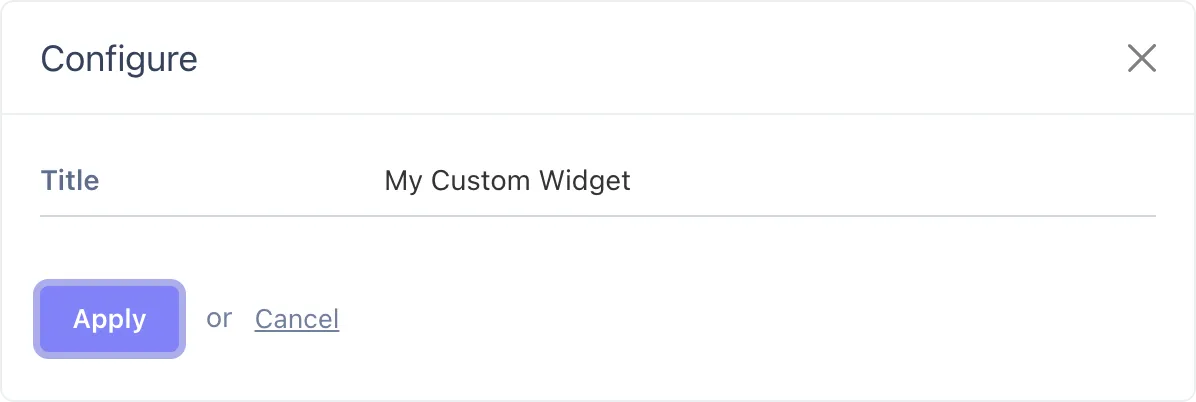
When you add a widget, its Settings form will automatically open:
# Handling Events
Dashboard widgets can trigger and handle events using the built-in AJAX framework. Our demo widget includes a button. We will create a handler, so when the button is clicked, the server code returns a random number to be displayed in the widget body.
First, the button must be defined in the component template. The code below defines a button and an element for displaying the value returned by the server:
<button
    class="btn btn-primary"
    :disabled="loadingButtonData"
    @click.stop.prevent="onButtonClick"
>Click me</button>
<span v-text="buttonClickResult"></span>
The loadingButtonData and buttonClickResult values are not yet available and need to be defined in the Vue component of the widget:
data: function () {
    return {
        buttonClickResult: null,
        loadingButtonData: false
    }
},
It's also necessary to create the onButtonClick method. This method utilizes the widget’s request method from the base widget Vue component. It sets loadingButtonData to true, signaling the start of loading. Upon receiving the server's response, the method updates buttonClickResult with the result property from the response. Details on creating a server-side handler will be provided later. The method includes some_var in the request data, which is not utilized in our current server implementation but may be useful in other scenarios. On the server, some_var value can be accessed using the extraData handler argument.
onButtonClick: async function () {
    this.loadingButtonData = true;
    this.buttonClickResult = null;
    try {
        const response = await this.request('onGetSomeData', {
            some_var: "some value"
        });
        this.buttonClickResult = response.result;
    }
    catch (err) {
        $.oc.alert(err.message);
    }
    finally {
        this.loadingButtonData = false;
    }
}
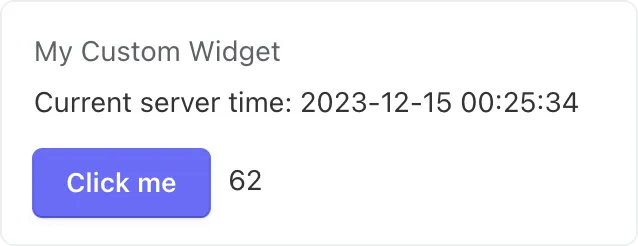
Finally, the server-side handler must be added to the widget's PHP class. Ensure that the handler function name corresponds to the one specified in the client-side request call. Additionally, it should be a protected method that accepts both the widget configuration array and the extra data array.
protected function onGetSomeData(array $widgetConfig, array $extraData)
{
    return [
        'result' => rand(1, 100)
    ];
}
Below is a screenshot of the widget displaying a random value received from the server: